When you see the moon, you might be tempted to take your cell phone and use its camera to snap a few pictures.
Same goes with the starry skies when you want to try your hand at astrophotography but don’t want to spend money on instruments like telescopes.
But can you really do astrophotography with an iPhone camera?
Although you can’t just take your iPhone as it is and take beautiful images of celestial objects, there are some tricks and tips that will improve your iPhone astrophotography.
All you need to get your hands on are some extra items (and tweak a few settings on your camera) to make the job easier. Let’s check them out so that the next time you’re stargazing, you can easily use your iPhone to capture images conveniently.
Contents
Top Tips For iPhone Astrophotography
To take great pictures that you’ll enjoy looking at, you’ll need to follow these tips.
Use Long Exposure
Before you can achieve your dream of taking pictures of the night sky with your smartphone, you need to ensure that your phone can take long exposure photos.
Long-exposure photography makes use of long-duration shutter speeds so that you can capture stationary elements of images while obscuring moving elements in the pic.
For astrophotography specifically, long-exposure images mean that the camera’s sensor can reveal more details than what the human eye can see, therefore capturing breath-taking details of celestial objects.
Some excellent iPhone models that will offer this feature include the iPhone 11, 11 Pro, X, and SE.
Get A Tripod
Once you’re sorted with the right iPhone and you have long exposure enabled, you will need to put it on a stable and secure tripod. If you don’t, taking long-exposure images will be frustrating because the camera will shake. Not sure what tripod to buy?
Here’s a good one: the GripTight GorillaPod Stand PRO, which is available on Amazon.
When you’ve set up your iPhone on the tripod, you’ll need to make sure that you don’t use the camera shutter button as any movement on the phone will make it shake and cause you not to get the best shot.
Use your headphones instead – their volume buttons can be used as remote shutter buttons to prevent anything from getting in the way of your shot.
Download Lighting Apps
The way telescopes for astrophotography work is by collecting as much light as possible so that you can better see the celestial objects in the sky. You need this because the night sky is really dark!
The problem with your smartphone is that it won’t be able to do this. You’ll need an app so that the phone’s camera will make the most of the current lighting.
A useful app to check out is PhotoPills. It will guide you on the best times to take pictures of the moon and other celestial objects so that you can make use of the most appropriate lighting.
It has some other great features too, such as helping you figure out the best exposure settings to get the perfect shot.
While you’re purchasing that app, don’t forget that you also need a pic-processing app so that you can perfect the images to make them look their best, such as in Photoshop or Lightroom.
Use A Telephoto Lens
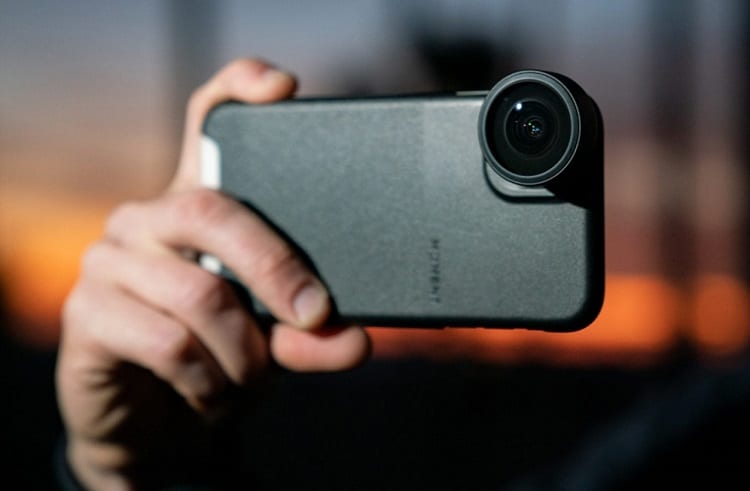
Another, slightly more advanced, way of taking awesome pictures of celestial objects with your iPhone involves the use of a telephoto lens.
One of the biggest benefits of using this lens with your smartphone is that it will take pictures of objects that are far away. The more optical zoom the lens possesses, the more quality will be infused into your iPhone astrophotography.
It’s a good idea to purchase an iPhone lens kit that contains a telephoto lens as well as some others so you can mix it up and play around with all of them to get the best images.
The Moment Lens kit is worth checking out. It has wide, fish-eye, macro, and telephoto lenses, and is compatible with iPhone and Android phones. You can check out the Moment lens range on Amazon.
The use of a telephoto lens will enable you to take pictures of things like the moon and even sunsets in greater detail.
One you’ve got a suitable telephoto lens, bear in mind you’ll have to use it in combination with all the previous items we mentioned to take images successfully – the tripod, headphones, and apps.
Use Your iPhone With A Telescope
Now, maybe you don’t mind purchasing a telescope to use with your smartphone when taking pictures of celestial objects. If you’re really keen on astrophotography, this is probably the best method to help you to take beautiful pics.
Besides for that instrument, you’ll also need a tripod so that you prevent wobbling from getting in the way of the perfect shot, as well as a smartphone telescope adapter.
It’s good to know that some telescopes you can purchase come with these adapters included, which takes the stress out of buying one separately. However, if your current telescope doesn’t, you can buy one from Orion.
It’s great because it’s compatible with all smartphone types, so you don’t have to worry about your specific iPhone model not working with it. It’s called the Orion SteadyPix EZ Smartphone Telescope Photo Adapter.
To make use of your iPhone and telescope, you can simply put your phone camera up to the telescope’s eyepiece. Known as afocal photography, this enables you to capture whatever you see in the sky. Just make sure the telescope isn’t shaking and you have a steady hand.
Use Your iPhone and Binoculars
Don’t have a telescope?
You can make use of binoculars! Yes, really.
Again, you’ll need a tripod to ensure that the binoculars won’t move around. You’ll also need a tripod adapter if you don’t have a large set of binoculars that are specifically used for astronomy and which come with a built-in tripod adapter.
Once you’re sorted with all your gear, all you need to do is attach the smartphone to the binoculars’ eyepiece. You’ll need a smartphone adapter for this.
Apps You Need For iPhone Astrophotography

Earlier, we mentioned that you need image-editing apps to make your astrophotography come to life. There are useful apps that you should consider. Here’s a rundown of some of the best.
Sun Surveyor
The Sun Surveyor app shows you the positions of the Milky Way, the moon, and the sun.
It’s a user-friendly app that informs you of when the best time to take your pictures is, so it’s the perfect companion when you’re on a stargazing trip. It also has a “Live View” feature to help you visualize where celestial objects are based on your location.
ProCamera
This app lets you tweak your smartphone’s camera so that you can make your pictures look more professional.
It comes with “low light” features that enable you to take up to 10 long-exposure pictures to produce a more vibrant and sharper final image. The bonus of using it is that it comes with photo-editing software so you can edit your astronomy pics wherever you are.
Snapseed
This is a popular app for astrophotography. It’s a professional photo editing app with which you can make various changes to your images. It has 29 tools and filters.
You can add warmth and saturation to your pictures, play around with shadows and highlights, and enhance the ambience to lighten up the background but darken the foreground. This is useful when you’re taking pictures of constellations, for example.
Stellarium
You can’t really immerse yourself into your astrophotography hobby if you’re not even sure what you’re seeing in the sky.
By making use of Stellarium, a free, open-source planetarium, you’ll see the sky in 3D. Not only will you be able to identify what you’re looking at but you’ll also be able to find out what time to search for them.
Tips For Taking Images Of Different Celestial Objects
It’s not just your phone and other items that we listed above that you need to use to get the best shots. Your technique will make a difference, and it should change depending on what celestial objects you want to snap.
Here’s a rundown of some of the most common objects you’ll want to take pictures of and how to make them look amazing.
Taking Pictures Of The Moon
Avoid the temptation to take pictures of the moon when it’s really dark outside – you’ll just be able to see a bright moon against the night sky.
You’ll get more visually appealing photos if you take pictures of the moon before sunset or just after sunrise has occurred. Avoid zooming too much into the photo as this will make the moon look pixelated, reducing the photo quality.
Taking Pictures Of The Constellations
The good news about taking pictures of constellations is that they are (surprisingly) easy to do. You just need to ensure you’ve enabled the phone’s ability to take long-exposure pictures and you need to keep your phone steady.
By using the wide field of view on your smartphone, you’ll be able to take pics of multiple constellations all within the same frame. You can then crop the image later with the use of a photo-editing app.
Pro tip: lock the focus and exposure settings on your phone when you have the perfect view of the constellation on your screen and try to keep the phone as steady as possible.
Taking Pictures Of The International Space Station And Satellites
You might not think you could take pictures of these with your smartphone, but you can.
You’ll need a tripod and a long-exposure app. But, as Photographing Space advises, make sure you find out when they’ll be passing overhead. You can do so with the Heavens Above website.
What Lenses Should You Get For Your Smartphone?

You can attach lenses to your smartphone so that you can improve your photography skills.
Here’s a rundown of some lenses you can purchase for your smartphone so that you can feel like you’re turning your phone into a telescope.
Zoom Lens
A zoom lens is important to help you zoom into the views of the night sky because if you try to use your phone to zoom in you won’t achieve the same level of quality in your photos.
With some lenses, you will have to manually focus them by turning the lens then you can proceed with focusing digitally with the use of your smartphone.
Try the zoom telescope camera lens kit that’s compatible with both iPhone and Android smartphones that enables you to take pictures that will make people think you took them with a telescope. It’s available from Amazon.
Macro Lens
This is a lens that boosts the magnification of your phone so you can see details that you wouldn’t be able to see with your eyes alone. Macro lenses are great for use in astrophotography because they enable you to pin-point the stars.
Try the Moment M-Series Macro Lens that you can purchase from Amazon. It comes with a removable light diffuser so you can prevent shadows from creeping into your images.
Fisheye Lens
This is a lens you’ll really benefit from using for astrophotography because it provides a much wider field of view.
While a regular wide-angle lens can give you a field of view that’s around 100 degrees, a fisheye can increase that to more than 180 across the diagonal, and you’ll also be able to achieve sharpness and clarity in your image even though you’re focusing on your subject really closely.
If you’re interested in a fisheye lens for your iPhone, consider purchasing Craicr’s iPhone lens. It also has a macro lens and wide-angle lens included.
The fisheye lens boosts the quality of your images by ensuring your subject looks crisp all across the photo and decreases instances such as ghosting that can reduce the clarity you want to achieve.
It’s a good idea to purchase lens kits for your phone. These can contain a variety of lenses that will boost your astrophotography prowess when you use your smartphone.
An example of a valuable kit to own is the Nelomo Universal kit that contains three lenses: a 0.65x super wide angle lens, a fish-eye lens, and a 15x macro lens.
Should You Use An iPhone Or Android Phone?
One of the big questions you might have when you want to take pictures of celestial objects with your phone is if you will get better images with an iPhone or Android phone.
The truth is that there are models of both types of phones that will enable you to take great pics.
As Digital Camera World reports, this is because many smartphone cameras can actually deal with low levels of light and the latest models will have quality sensors and software on board, such as the iPhone 11 Pro, Samsung Galaxy S20 Ultra 5g, and Xiaomi Mi Note 10.
People who have conducted experiments with iPhones versus Android models have found pros and cons of using both. For example, when PC World tested the Pixel 4XL vs the iPhone 11 Pro, they found that Pixel’s astrophotography mode gave it an advantage over the iPhone.
This feature makes it super-easy to take pictures of the sky because it automatically engages long-exposure images to be taken. That said, the iPhone was better when it came to providing more color-accurate images of night shots.
The good news is that you don’t have to replace your phone! Just make sure that you make the most of its features and see if you can play around with its settings to enable a better astrophotography experience.
Related Questions
How can you prevent your iPhone battery from draining quickly when taking photos?
After making sure your iPhone is fully charged when stargazing, you should get into the habit of only taking pictures and videos when you’ve set up all the other elements you need for astrophotography. This will preserve your battery life.
Why is it said that when taking photos of the night sky you should turn your iPhone screen red?
A red screen enables you to better see the screen without hurting your eyes when your surroundings are pitch black, such as when checking an astronomy app during your iPhone astrophotography session.
Conclusion
It’s exciting to think that you don’t need a fancy camera to take photos of celestial objects. Your iPhone can work its magic, but you just need to ensure you have everything you need in order to make it a success.
In this article, we’ve looked at how you can turn your iPhone into a top-notch piece of equipment for astrophotography and we’ve also included some important tips you need to follow so that you take breathtaking images of the sky in a snap.


