You’re in your favorite stargazing location taking pictures of many stars and constellations.
The images look great when you view them on your camera’s display screen but then later when you get home and view them on your computer, they look pale and washed out.
What’s happened to your images?
Noise is the culprit! Noise in photography can be described as graininess that appears in your shots and decreases the quality of your images.
Noise is the enemy of astrophotographers as it can make your images completely useless, especially if you’re not expecting the noise to occur because then you have the problem of trying to reduce it later on.
Also, since you’re going to be taking long-exposure shots of celestial objects in the sky with a camera that has a high ISO setting to encourage more light to strike the camera’s sensor, you will risk having images that have a lot of noise.
To deal with this, you have to process your images with image stacking software.
Contents
What, Exactly, Is Image Stacking?
You might’ve heard people in astrophotography circles talk about stacking images. It’s actually one of the most important things you should do if you’re taking pictures of the night sky.
What does image stacking images mean?
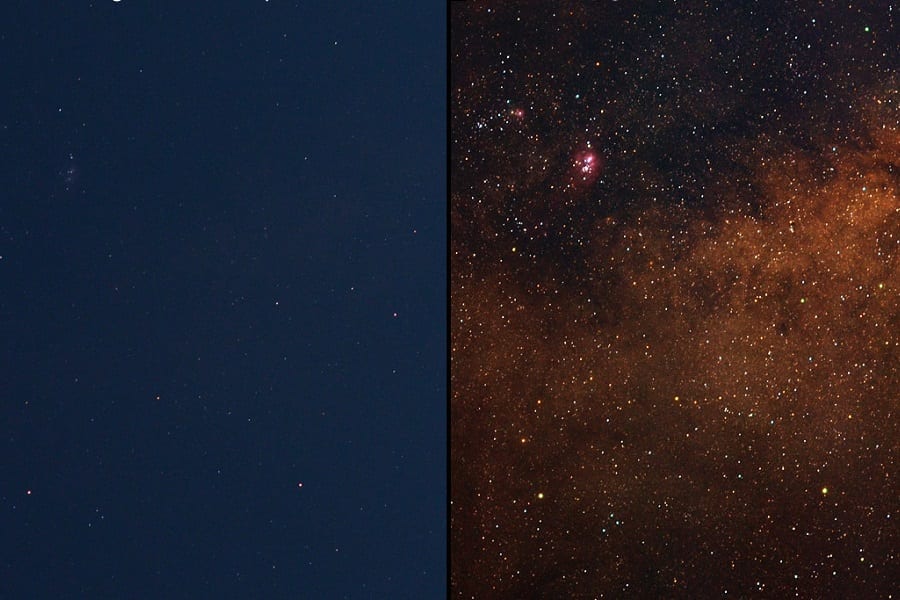
Image stacking refers to taking many shots of the same image and then blending them together on your computer. This helps to reduce noise and make the images look much better than they would have in their original, individual form.
Image stacking prevents that graininess in your night sky images, helping to create smoother and more appealing pictures.
It also improves the signal-to-noise ratio of images.
What’s that, you ask?
When you take pictures of the sky, you want to make the celestial objects brighter and clearer and separate them from the background of sky, and for this you need a good signal-to-noise ratio.
This means you have to boost the signal, which you can do by collecting more photons with longer exposures from the celestial object in the image, as Astro Pix explains.
That sounds complicated, but by taking pictures with shorter exposures and stacking them to create a longer one that gathers more photons, this will improve the signal-to-noise ratio. Then you can process the images to make dim or faint details in them look much more vibrant.
When you stack your images with the use of astrophotography stacking software, noise diminishes while the signal remains constant, as Sky at Night adds. Your pictures will come alive!
If you want to start image stacking your astrophotography pics, here’s everything you need to know about how to get started.
Download The Right Software

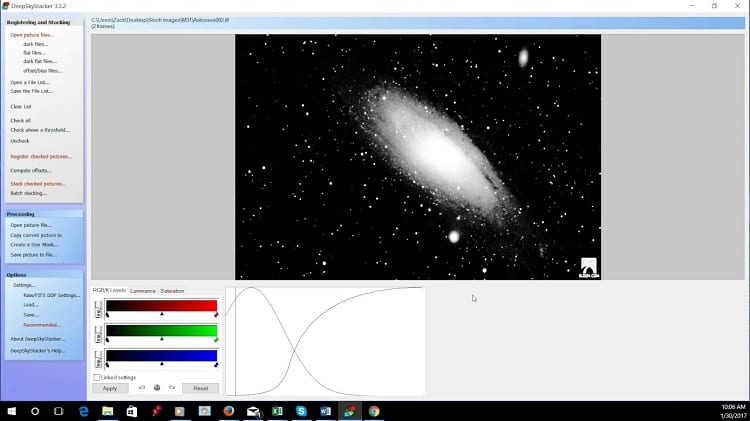
In order to stack your images, you’ll need to get your hands on the right software. Here’s one to try: Deep Sky Stacker. How this freeware works is that it stacks your pictures into a single frame.
This brings details in the images to life that wouldn’t have been captured in a single image. It also means that you can use short exposure images to take pictures of deep-sky celestial objects.
Another stacking program to try is Starry Sky Stacker. People have said it’s easier to stack images with it than with Deep Sky Stacker.
It’s also for use on Mac while Deep Sky Stacker is only compatible with PC. Starry Sky Stacker works well for stacking images of galaxies, such as the Milky Way. However, it does cost $24.99.
Here are three other types of image stacking software to consider.
PixInsight
PixInsight is said to produce sharp, crisp images. It works on both Mac and Windows devices. However, it is a bit complicated to learn and it costs approximately $269.00.
You can try the 45-day free trial and see how you go. If you’re serious about astrophotography, it’s a valuable type of software that will make your images look much more professional.
Sequator
Sequator is easy to use, which makes it appealing to beginner astrophotographers. It’s also freeware. If you’re very interested in astrophotography and think you’ll use image stacking software regularly, you might want software that’s a little more powerful.
That said, this software can be used for deep-sky image stacking and you can also use it when you want to stack starry landscapes in which the foreground can be seen.
AutoStakkert!
AutoStakkert! helps you produce better quality images and it aligns as well as stacks image sequences.
This prevents distortions from getting in the way of your final product. It’s said that it’s meant for treating images of the sun, moon, and planets.
However, it’s best used for fixing images that have been shot with the use of a tripod as some people have found that they battle when it comes to aligning images. It’s also only compatible with Windows. The good news is that it’s freeware.
Some Extra Tips For Image Stacking
How you take photos of celestial objects matters because this will influence the results you’ll be able to achieve later on when you stack your photos. Here are some tips to bear in mind when you’re armed with your camera and taking shots of the night sky.
- When you take pictures, you obviously need to take multiple images of the same area of sky in order to stack the images later. Take as many as possible!
- All the images must have the same shutter speed, aperture, and ISO. You want to keep these settings as follows: choose 10 seconds for shutter speed and an ISO of around 800. This ISO amount will provide you with enough light to help you better see and capture celestial objects without providing negative effects of using a larger ISO, which includes a noise – the very thing you’re hoping to eliminate. You should also choose an aperture that’s as wide as possible to bring in a lot of light.
- Set your focus to infinity and remember to turn off autofocus on your camera. Setting infinity on your lens will help you to focus on a bright star in the sky. You should avoid using your camera’s in-build autofocus feature simply because the stars in the night sky are too small and dim for the camera to focus on them properly.
- You must shoot a set of images that have the same settings you’ve used earlier but these shots must be taken with the lens cap on the camera’s lens. These are known as dark frames.
Why are dark frames important for image stacking?
Stacking software uses dark frames to decrease the amount of noise in pictures. This process is known as dark-frame subtraction.
Make sure you take the same amount of normal shots as dark-frame pictures because the software you use will require both in the same quantity.
You might wonder why image stacking software needs dark-frame images, but it’s simply because they provide the software with a set of images that only contain noise so that it can figure out how much noise it should expect in the images and can decrease the noise from the light frames so that those pictures look better.
Should You Use RAW Format For Your Images?
The RAW image format offers benefits you won’t get when you use a JPEG format, such as greater dynamic range in your pictures.
When it comes to stacking images specifically, you need to check what image format is used by the stacking software you’re keen to try out. For example, software such as Starry Landscape Stacker requires you to convert RAW files into 16-bit TIFF files, not JPEG.
Related Questions
If your stacking software wants TIFF images, do you need to shoot these with your camera?
Your camera might not support TIFF images, but that’s okay. After taking the images in JPEG or RAW format, you can use a TIFF format to process them. The format is lossless, meaning you won’t lose data when you change the files.
How do you achieve pinpoint stars in your final images?
When you shoot the stars, use shorter shutter speeds for your focal length so that the stars don’t look like they’re moving. This will also have the benefit of decreasing noise, as Outdoor Photographer explains, so you won’t have to worry too much about it when stacking images.
Conclusion
While you might have perfected the art of taking shots of the deep sky, you’ll need to process your images afterward. Stacking your astrophotography images is a useful technique to make your astrophotography sessions under the sky much more useful and valuable.
In this article, we’ve looked at what image stacking is as well as how to do it by providing you with five of the best types of image stacking software to try.
You now know everything you need to know about how to stack images so that you wind up with quality shots that make you feel proud.


