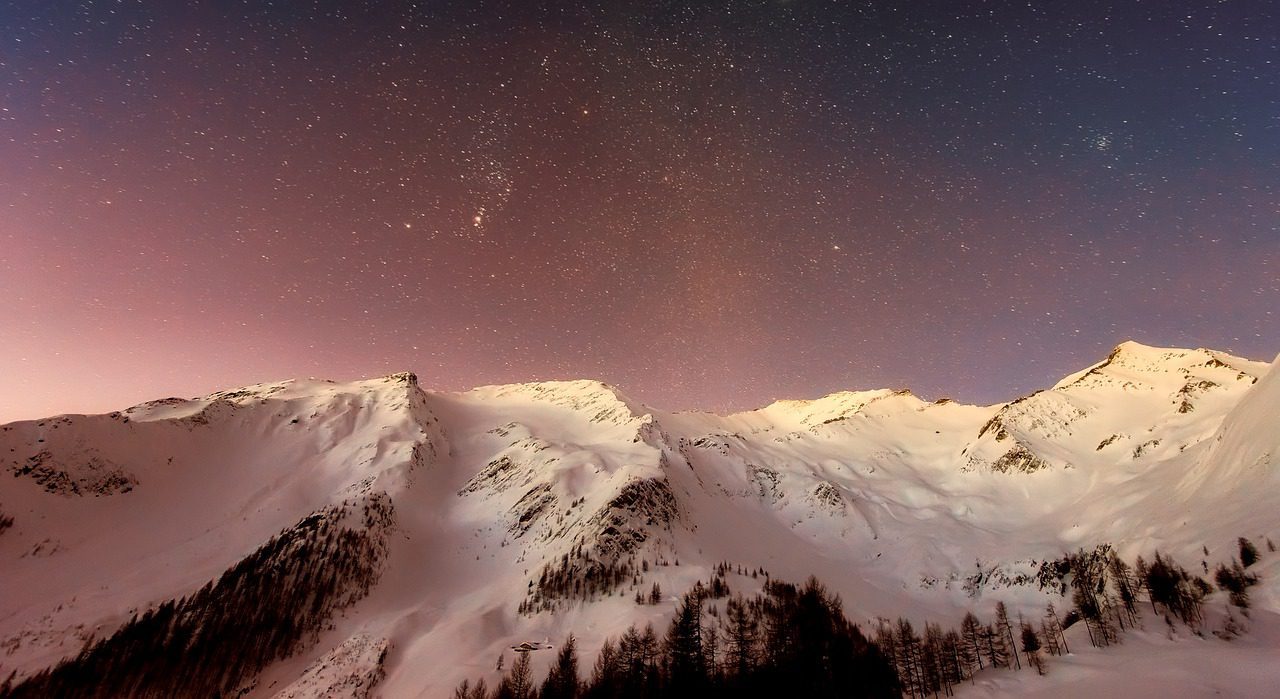
There is no doubt that winter is by far the best season for photography. As a result, preparing for astrophotography in winter as an astrophotographer is vital. Despite the fact that the Milky Way core tends to be more visible during summer seasons, other celestial bodies tend to be better during the winter seasons.
The harsh and yet beautiful winter conditions make it a perfect environment for astrophotography. However, you should note that winter astrophotography comes with several challenges. Therefore, in this guide, we are discussing how to prepare for astrophotography in winter.
Contents
Preparing for astrophotography in winter. What is necessary?
Since you will be leaving the comfort of your home, being prepared for astrophotography in winter is crucial. To do that, you should ;
· Keep yourself warm. Ensure that you pack all the essentials from gloves to blankets and socks.
· Warm thermos. A warm thermos full of your hot liquids tends to comes in handy while you are out there.
· Always bring the right gear. Ensure that you have all your equipment with you, from cameras to the right lenses.
· Check the operating temperature range of the electronic equipment you will be using.
· Keep laptop warm. If you use laptop outside wrap it in towels, a sponge, or styrofoam housing to keep the electronics from freezing.
· Choose a safe spot. Always consider taking choosing the right and secure location for your astrophotography session.
· If its snowing … we will skip that day because due to poor visibility, snowflakes, and many other reasons. Because the pictures we would make that day would be of low quality and not usable.
Ultimate begginer guideline for astrophotography in winter
While most people bundle up inside their homes as temperatures drop at night in winter, astrophotographers often take this opportunity to take some of the best images of astronomical objects.
Taking a great picture of celestial events is never an easy task. You will need to get prepared for this magnificent task. To achieve that, here are some crucial tips.
Look for a sweet dark spot
A dark area free from light pollution is considered the best spot for astrophotography. It would be best to consider using sources such as a light pollution map or an app that will help go far from light pollution. By doing so, you will be able to get some of the best photos without tainting your view.
Unless you are trying to shoot cityscapes, going approximately 30 to 50 miles away from the city will ensure that you have the best result. The darker the area, the better your photos will be.
Furthermore, you should pick an eye-catching location, angle to shoot from and a focal point. It would help if you scoped out sites during the daytime for a better result. Consider finding some interesting focal points such as rolling mountains or a lake that reflects stars’ light.
It is best to experiment and look for a spot for shooting celestial objects. By doing this during the day, you will be saving yourself from stumbling in the dark and working on guesswork.
Find constellations with astronomy or sky simulator.
If you are looking for a clearly exposed constellation, you might consider using tools such as Stellarium or similar software, i.e. apps for tracking the night sky. This tool will help you pinpoint planets and stars visible from your location on a particular day.
Pack the right gears
Going for a night shoot during the winter season needs one to be fully prepared. Ensure that you carry clothes that will keep you warm. Furthermore, it is highly recommended that you dress in layers of clothes.
When it comes to cameras, you should bring a wide-angle lens equipped with the widest aperture possible. Such lenses are ideal for capturing light since the sky is dark. You will also require a sturdy tripod that will hold still your camera since you will be working for an extended period.
Since your hand will not be steady for a long while shivering, having the right tripod will prevent you from capturing blur or shaky pictures. Always bring a back-up battery since they often drain at a fast rate in a cold environment.
Test shots for getting perfect astro picture
In case your shooting location is near, or you are committed to a particular image, you might consider taking test shots at night. This will help you pinpoint the exact vantage point, gear, and correct camera setting, allowing you to get the perfect picture.
Usually, the camera settings will change from one place to the other. However, it is recommended that you start with a wider aperture, ISO setting and 15 to 30-minute exposure. In most cases, ISO 1600 or 3200 is considered best for use at night for astrophotography.
Instead of compressing your photos into JPEG, you should consider capturing them raw. A raw photo will require extra editing on software such as Photoshop or Lightroom. However, they do not discard the previous image data for compression, such as JPEG.
Assess sky and weather conditions
When planning to go for astrophotography, picking a night with the right weather condition is paramount. Unlike taking pictures during the day, surprises such as rain and clouds don’t offer good results for astrophotography.
Getting a good shot of the stars while the sky is full of clouds is slim. In case you would like to have a shot of the moon’s ambient light, you will have to know exposed constellations have to be sacrificed for a lovely lit landscape.
It best if you review your local weather report to avoid surprises while you are out there. In most cases, phrases such as mostly clear or passing clouds are considered a sign of great shots within your grasp. However, mostly cloudy or an overcast are phrases that suggest you pick a different night.
Top winter deep-sky targets
As an astrophotographer, there are some deep-sky targets you always want to capture. Some of the best winter deep-sky targets you might consider capturing this winter include;
Orion Nebula
This stellar nursery is by far the most targeted celestial events among astrophotographers, particularly newbies. With intense color and the incredibly satisfying result makes photographing Orion Nebula a project that might last forever.
Usually, the most challenging part is revealing deep outer nebulosity while you blend it with an exposed core. The process can be challenging for newbies, but the result is worth the hustle.
Flame Nebula and horsehead
It is one of the most exciting areas of the sky, and it lies close to Orion Nebula. Horsehead and Flame Nebula are located close to Alnitak, the far left star in the Orion’s Belt. You can capture the fantastic horse head using hydrogen-alpha filtered DSLR.
Rosette Nebula
You can record the Rosette Nebula with or without a DSLR. The Rosette Nebula is classified as NGC 2237, and it is located in a constellation that neighbors Orion, and it is known as Monoceros.
Point to note
The three discussed deep-sky targets are located within the same region of Northern Hemisphere Sky, making it easy to capture them simultaneously.
Final verdict
Astrophotography during winter seasons means you will have to endure cold nights. However, you will have plenty of time to capture some of the best celestial images despite the harsh condition. Moreover, modern astrophotography tools have been designed to withstand all elements associated with winter.
This means that you can operate your camera at sub-zero temperatures with the utmost ease. As you prepare for astrophotography in winter, you should consider adhering to the tips discussed in this article. As we conclude, we hope that you find this article beneficial as you get ready for this year’s winter.


