Rank | Photo | Model | Rating | More Info |
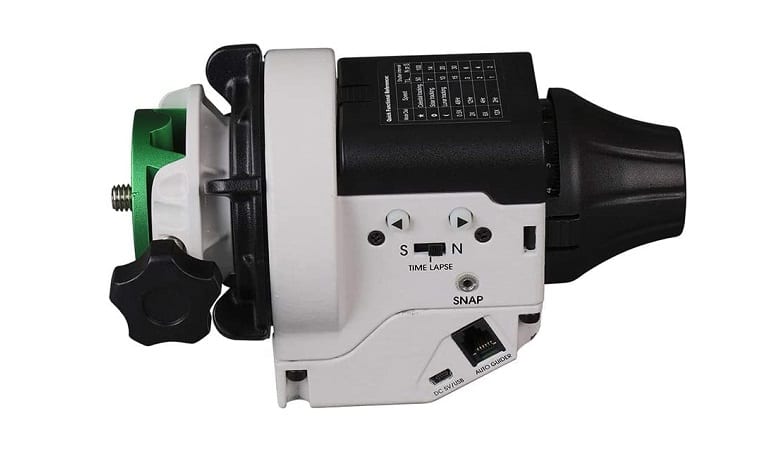
#1 | BEST MOTORIZED DSLR SKY TRACKER SkyWatcher Star Adventurer Photo Kit | |||
#2 | Vixen Optics 35505 Polarie Star Tracker | |||
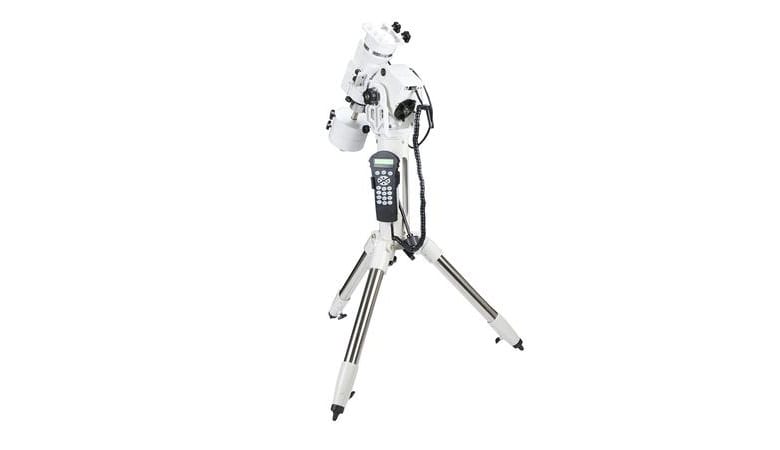
#3 | BEST MOTORIZED TELESCOPE MOUNTS WITH SKYTRACKERS SkyWatcher AZ-EQ5 Telescope Mount | |||
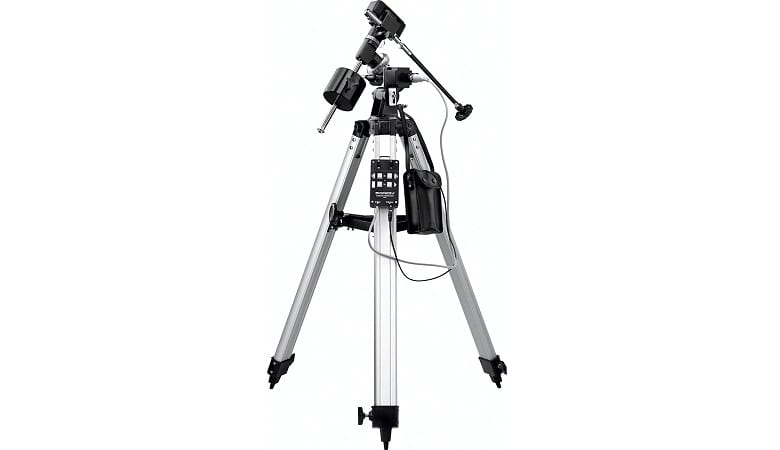
#4 | BEST MOTORIZED TELESCOPE MOUNTS WITH AZIMUTH Orion Adventures in Astrophotography Bundle | |||
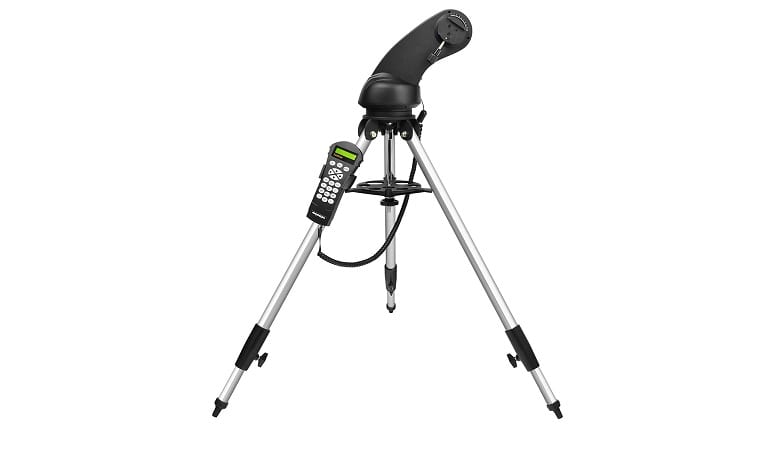
#5 | Orion 13165 StarSeeker IV GoTo Altazimuth Mount |
If you want to locate and capture celestial objects in space, you’ll need to make use of a star tracker.
This is important because these devices actually get in sync with how the earth rotates.
Why is that important?
This enables you to shoot pictures with longer exposures so that you can get more details and avoid those horrid star trails that feel like a sore thumb on your images.
You also need a tracker to increase your exposure times so the earth’s rotation doesn’t make the stars you’re trying to photograph look blurry. Here are the best star trackers for your cameras and telescopes.
Best Star Trackers – Reviews & Buying guide for 2020
Best Motorized DSLR Sky Tracker: SkyWatcher Star Adventurer Photo Kit
This sky tracker looks like something out of a sci-fi movie!
By using it you’ll be able to see much more details when looking at eclipses, galaxies, and planets! Let’s check out its specs.
Featured specs
- Illuminated polar finderscape
- Brass and aluminum construction
- ST-4 port
Benefits
- This sky tracker has a motorized and portable tracking platform.
- Finding Polaris, the North Star, is usually the first thing to do when you want to start finding stars in the sky. This mount makes that really easy because it has an in-built illuminated polar finderscope. This means you will be able to easily align with Polaris.
- This tracker enables smooth star tracking because of how it’s been constructed with rugged brass and aluminum gears.
- If you’re interested in astrophotography, you’ll love being able to mount a ball-head onto this system with the use of an adapter that’s included with your purchase. This will ensure better stability during use.
- This tracker is versatile: it’s got a modular design so it can easily be connected to other photographic tripods. You can even use it with your telescope!
- It comes with an AA battery compartment that will boost its power for up to 72 hours, which is perfect if you’re going on a road trip to a stargazing site that’s off the beaten track. In addition to this, you can also make use of the 5v mini-USB port if you need an external power source.
- To avoid capturing star trails in your astrophotography, this mount has a ST-4 port that enables you to connect an auto-guider if you want extra accuracy when tracking the stars so that they show up as perfectly round.
Drawbacks
- The instructions that come with the star tracker are poor.
- Some parts of this tracker are made of plastic, which can break easily. These include the polar scope’s plastic cover and the plastic battery compartment.
Extra Features
- This star tracker enables you to shoot for longer exposures – up to several minutes! You’ll be able to capture photos of celestial objects while marvelling at their details and beauty.
- It’s compatible with most DSLR cameras.
Buying Advice
This SkyWatcher star tracker has many benefits and perks when you want to track celestial bodies, especially since it’s the best star tracker for DSLR cameras.
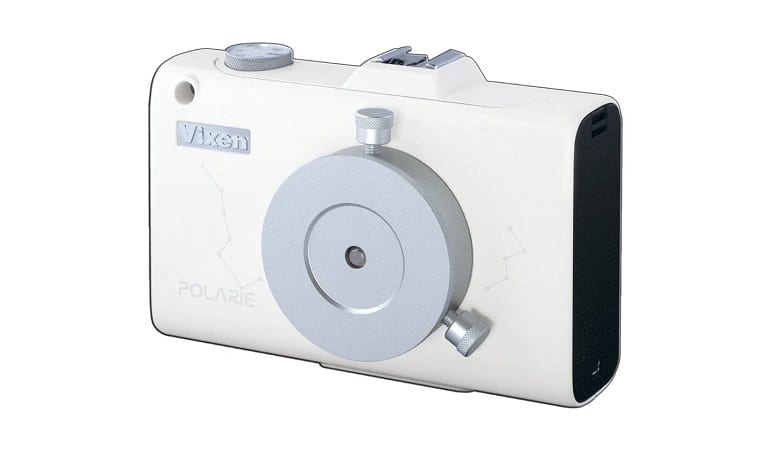
Runner Up: Vixen Optics 35505 Polarie Star Tracker
This star tracker looks like a camera!
It’s easy to carry around with you and has many other benefits if you’re looking for one of the best motorized DSLR sky trackers on the market. Here’s what to know about it.
Featured specs
- North Star alignment window
- Illuminated latitude dial
- Compass included
Benefits
- You can use this star tracker with the digital camera you own or make use of an adapter to be able to use it with your smartphone.
- It can easily attach to a regular camera tripod. As long as your camera doesn’t weigh more than seven pounds, it will work well.
- It comes with a compass included and has a North Star alignment window.
- It’s easy to use. Once you’ve aligned it, the mount will track the movement of stars so that you don’t have to end up with blurry images or stars that look like comets because they’re not focused properly.
- The pack includes the mount and tripod, an electronic motor drive, and a ¼-inch-20 adapter so you can attach the camera to the mount.
Drawbacks
- People have reported that the battery life is really short – some have said they hardly get two hours out of this star tracker.
- The tracker comes with a tiltmeter (a device that measures small changes from the vertical level on the ground) but this is difficult to view in the dark.
Extra Features
- This star tracker can be used with AA batteries or be run on AC power.
- The setup and alignment of this star tracker is really easy, which makes it great for beginners.
- If you have to align the stars in the dark you can use the illuminated latitude dial, which is great.
Buying Advice
This Polarie star tracker is solidly built and has user-friendly features you’ll enjoy using when you’re photographing the night sky.
Best Motorized Telescope Mounts with Skytrackers: SkyWatcher AZ-EQ5 Telescope Mount
If you have a telescope, you’ll want to make use of this computerized equatorial mount because it will improve your views of the night sky. Here’s what to know about it.
Featured specs
- Belt-driven stepper motors
- Metal construction
- Sync-Scan hand controller
Benefits
- This mount can be used in azimuth, equatorial, and dual modes, so it’s highly versatile.
- It makes use of stepper motors that are belt-driven. This is important because it’s quiet and ensures greater accuracy when tracking celestial objects.
- It’s built to be strong so it can support your telescope with ease. This is as a result of its all-metal construction. It can support telescopes that are up to 30 pounds.
- You’ll love being able to move the mount without experiencing a loss in alignment, thanks to the patented dual-encoder motor system known as Freedom-Find.
- It makes use of what’s known as a SynScan hand controller. This is a celestial object database with over 40,000 objects that will inspire you to find them.
- One of the biggest benefits of using a German equatorial mount instead of other types of mounts is that it offers good counterweight. Since the distance from the mount’s main axis to the telescope is shorter in these types of telescopes, this reduces the vibration that can be caused and it makes the telescope much more stable.
Drawbacks
- The reticle on this tracker isn’t illuminated, which makes using it at night a bit frustrating.
- People who’ve purchased this star tracker have stated that it doesn’t come with a carry case for either the tracker or the tripod that’s included with the purchase, so you’ll have to buy those separately.
Extra Features
- This tracker has a SNAP port. This ensures that you can enjoy remote-controlled DSLR camera usage, therefore preventing things like camera shake from getting in the way of your image quality.
- People who have purchased this star tracker have reported that it remains solid and stable when in use, which is fantastic because any slight vibration can create noise in your images.
- It’s easy to move around and lightweight, making it user-friendly for people of all skill levels.
Buying Advice
This German equatorial mount is available from Amazon sellers. Although it’s a bit expensive, it’s one of the best star trackers for your telescope thanks to all its practical and unique features that will make your time in your stargazing location a much happier experience.
Best Motorized Telescope Mounts with Azimuth Programming: Orion Adventures in Astrophotography Bundle
If you’re looking for a budget-friendly star tracker that you can use with your camera to take pictures of the night sky, this Orion mount is a good choice and it comes with many extras included. Let’s check them out.
Featured specs
- Versatile and compatible with most DSLR cameras
- Great for galaxy shots
- Simple setup
Benefits
- This start tracker works with most DSLR cameras.
- Once set up, it’s very stable and solid, so you don’t have to worry about it making your camera wobble.
- People have stated that you’ll be able to take lots of amazing images of the night sky with the use of this star tracker, such as of galaxies like the Milky Way.
Drawbacks
- Some people who have purchased this star tracker have reported that its drive motor mounting sometimes gets in the way of the RA axis. This means you sometimes have to move the RA head away when you try to take images.
- If you’re a complete beginner, you might be disappointed with this tracker’s lack of instructions.
Extra Features
- It’s really easy to assemble this mount so you can start using it immediately.
Buying Advice
This Orion star tracker and astrophotography tracking mount is a valuable investment if you’re starting out with astronomy and astrophotography, but just make sure you have some knowledge of star tracking before you attempt to use it as that will make your experience with it much better.
Runner Up: Orion 13165 StarSeeker IV GoTo Altazimuth Mount
Orion features on our list of the best star tracker mounts again, this time with their StarSeeker IV. Let’s check it out to see why it’s worth your money if you’re interested in astronomy.
Featured specs
- Computerized mount
- Automatic alignment
- Accessory holder
Benefits
- This is a computerized GoTo mount that has a tripod.
- It boasts a database containing more than 42,000 celestial objects to find in the sky.
- You can use this on telescopes that don’t weigh more than 13 pounds.
- You can manually move this telescope without having to worry about losing your alignment. Once it’s in the position you want it to be in, it will automatically re-align so you can continue taking pictures of the night sky.
- It has a slanted arm that enables you to make use of horizon-to-zenith pointing. In case you don’t know, zenith is the location overhead. This tracker gives you the chance to use larger telescopes and be able to point to that area of the sky, which is something that some other trackers don’t allow.
Drawbacks
- Some people who have purchased this tracker have reported that it’s disappointing that it doesn’t come with an in-built level and there’s no place on the tracker to install your own one.
- Other people have reported that it’s not too easy to use the tracker’s alignment and takes a bit of time. This, then, could make it a little tricky for beginners.
Extra Features
- This mount is really light and easy to transport, as it only weighs 13.4 pounds.
- While it’s light and portable, it offers a rock-steady setup for your telescope.
- One of the things that contribute to its stability is that it has a dual-purpose accessory holder. This keeps the tripod sturdy. It also gives you the convenience of storing your accessories when you’re shooting in remote locations.
Buying Advice
This Orion star tracker’s got lots to offer and some unique features that are sometimes difficult to find in other star trackers on the market, making it a valuable motorized camera mount.
Star Trackers FAQ
If you don’t know much about star trackers, whether used for cameras or telescopes, you’ll probably have some questions. Before you purchase a star tracking mount, here are some important things you need to know.
What does a star tracker do?
A star tracker is one of the most valuable pieces of equipment you need to own if you’re interested in astronomy and astrophotography.
How it works is that it matches the speed of the earth’s rotation, but moves in the opposite direction to our green planet. This is important if you want to capture images of celestial objects in all their glory and with minimal distortion as they move across the sky.
Sometimes you’ll find that star trackers will be quite heavy and solidly built so that they can accommodate weight on them, such as in the form of telescopes.
However, as we’ve seen in these astrophotography mount reviews, it’s becoming more common for star trackers to be small and compact as this makes it easier for people to carry them around.
You can use star trackers for various purposes, such as capturing deep-sky objects like galaxies. You can also use star trackers to better capture landscape photos when it’s dark.
Doing this will require you to make use of advanced post-processing features so that you can connect the sky photo that’s been tracked with the foreground which hasn’t been tracked, as Peta Pixel reports.
This is essential because the foreground in your shot will be blurry as a result of how the star tracker slowly turns in order to keep up with the speed of the stars.
To ensure the star tracker works well, you need to properly align it.
How do I align the star tracker?
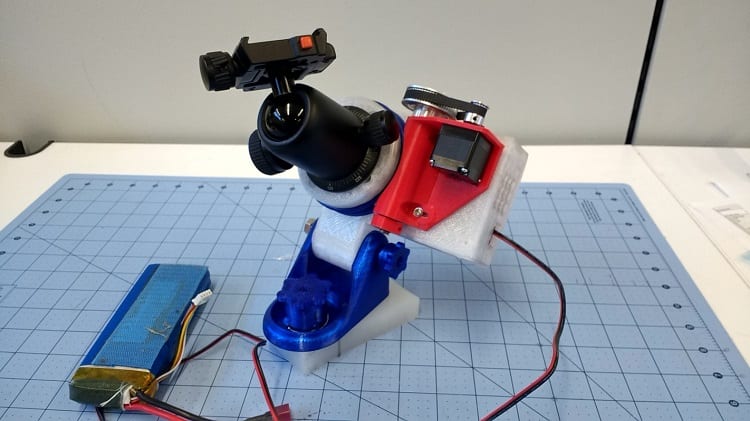
In order to align your star tracker with a process known as polar alignment, you will need to follow these steps.
- You’ll have to align the star tracker to Polaris, the North Star, as it’s the brightest star in the sky. Once you’ve located it, you have to line it up with the polar scope.
- You will then use the controls on the star tracker to fine-tune what you see. You want the star to appear in the telescope’s reticle.
- You can make use of a phone app called Polar Aligner Pro which will ensure that you align the star tracker correctly. How it works is that it will use your location to determine where you’ll see Polaris in the night sky so that you can then put it in the right spot on the reticle. This will ensure perfect alignment.
Other tips:
- Always check the star tracker base’s bubble level after you’ve moved it to get the right angle of where the telescope should be pointed. This is because you don’t want it to be uneven.
How do you set an equatorial mount?
If you have an equatorial mount but you’re not sure how to set it up, don’t worry – here are the steps you should follow so that it will be up and running in no time.
- First, you want to adjust the tripod legs in such a way that the top is in line with your hips.
- Fit the accessory tray of the mount if the one you have came with a tray.
- The top should be level and the leg that’s labelled “N” needs to be pointing to the North.
- Put the mount head onto the top of the tripod. You’ll have to ensure you line up the metal peg that’s located on top of the tripod with the gap that’s visible underneath the mount, between the two bolts, as Sky At Night advises. You want to ensure you fasten the mount head to the tripod by tightening the large bold that hangs underneath the top of the tripod.
- Next, you want to screw the counterweight bar into the mount head by keeping the rod’s locknut tight against the mount and removing a safety screw from the end of the bar. You should slide the counterweights so that they’re halfway up the bar and tighten the screws on the counterweights. Tighten the safety screw.
- Make sure the Right Ascension (RA) axis of the mount is pointing to the North Pole. The altitude setting of the mount should be the same as your local altitude.
- You’ll also need to release the bolts on the front and back of the mount and tilt the head of the mount so that its pointer can be aligned with the number on the altitude scale. Tighten the bolts again.
- Put a slow-motion cable on the D-shaped shafts on the declination and RA axes of the mount.
- You’ll see two tube rings in the mount head that keep the telescope in place, so you’ll have to attach them to a mounting plate that’s clamped into the mount head.
- Keep the rings open so that you can put the tube in the rings. Put the top part of the rings over the tube and make sure you screw the locking bolts so that the tube remains securely fastened.
- Put the finderscope into the bracket. You want to screw it into the clamp that’s on the telescope tube.
- Align it by putting an eyepiece that has low magnification into the scope’s focuser. Try to look at something on the horizon through the finderscope to help you align it. You should adjust the screws on the bracket until you can see the object in the crosshairs.
- Finally, you need to balance the scope by sliding it back and forth until it can rest flat. Keep the tube horizontal and the declination axis lock loose during this process.
- You’ll also have to balance the Right Ascension (RA) axis. You can do this by keeping the counterweight shaft in a horizontal position, loosening the lock, and then adjusting the counterweights until you can see that the scope remains in place when you remove your hands.
Do you need an equatorial mount for astrophotography?
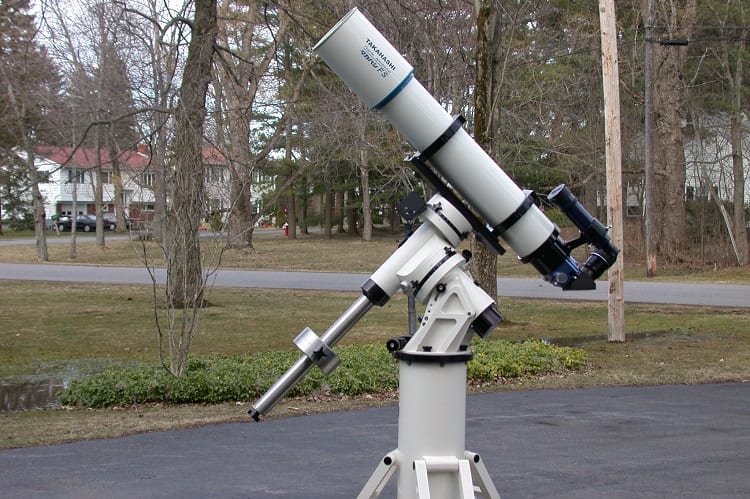
One of the biggest questions you might have when starting astrophotography is if you should have an altazimuth or equatorial mount. Let’s look at equatorial mounts in more detail and find out if you really need one or not.
First of all, what is an equatorial mount?
An equatorial mount has a declination (Dec) axis. This lets the scope move north and south. It also has a right ascension (RA) or polar axis. This lets the scope move east and west. These are pretty much what you’d also find in an altazimuth mount.
What’s different with the equatorial mount is that its polar axis must be polar-aligned to the North Pole. The reason for this is because this is what all the stars appear to move around.
When you’ve ensured your mount’s polar axis is aimed directly at the celestial pole, then it will be parallel to the rotational axis of the earth. This setup enables the equatorial mount to follow the sky’s movement from east to west.
There are many advantages of choosing an equatorial mount. Let’s look at them.
- One of the biggest benefits of using an equatorial mount is that it enables you to take pictures of the night sky because the celestial object that you’re viewing and capturing will remain in the center of your eyepiece, therefore making it easier for you to get great shots of it.
- An equatorial mount enables you to follow a celestial body that you want to view and capture as it moves through the sky and you can do this just by moving the mount to the right.
What is the difference between the alt azimuth and equatorial mounts?
These are two popular types of mounts for astrophotography, but what are their differences, and which one is better to purchase?
Here are the pros and cons of both.
What they are:
- The altazimuth (sometimes referred to as the alt-az) mount is a simple mount that has two motions: vertical and horizontal. This mount has slow-motion knobs on it so that you can make precise adjustments when tracking celestial objects across the sky. It’s an ideal mount for when you want to engage in terrestrial observations and for scanning the stars but it isn’t ideal for deep-sky photography because it doesn’t have the power for that.
- An equatorial mount is much more powerful than an altazimuth mount because of its alignment. Once properly aligned, you can put a telescope on it and point it at any celestial object, after which you’ll be able to track it with slow-motion controls or with the use of a motor.
Their pros and cons:
Altazimuth Mount Pros
- These types of mounts are really simple and easy to use, such as because their controls only engage in up and down and left or right movements.
- They are cheaper than other types of mounts.
- They’re excellent to use for beginners because they don’t require a lot of effort or knowledge when setting them up.
Altazimuth Mount Cons
- The altazimuth mount isn’t ideal for astrophotography as it doesn’t track celestial objects as they move across the sky.
Equatorial Mount Pros
- One of the main advantages of using an equatorial mount is that it does a good job of tracking celestial objects and it’s therefore a valuable mount to use for astrophotography.
- These mounts are really useful for setting your sights on a specific celestial object for a long time.
- They’re valuable for use with long-exposure astrophotography.
Equatorial Mount Cons
- These types of mounts tend to be more expensive than altazimuth mounts.
- You might also find it more difficult to set up an equatorial mount until you practice and learn more about it.
Conclusion
Star trackers are valuable as gems when it comes to astronomy and taking pictures of the treasures in the night sky. In this article, we’ve reviewed the best star trackers for your cameras and telescopes.
We’ve also answered some important questions you might have about star trackers and mounts that will help you when you need to align your tracker so that you can start exploring the night sky without delay.
